|
Tutorial - VC-Z HALCON Image Acquisition Interface
1.0
|
|
Tutorial - VC-Z HALCON Image Acquisition Interface
1.0
|
At first we need to get images from the camera in order to build the image processing task.
In this tutorial, we assume that the VC-Z camera has this IP address:
Conect to the SSH server of the device as 'root':

The password is 'root'.
And then launch the embedded Image Server with this command:
And finally launch the simple image acquisition sample on the camera :
On the host PC where we can PING the camera, launch the 'atxClient' and enter the IP of the camera, the size of the sensor in DX and DY and finaly you can snap an image by a clic on 'Get Image'. You have to save some of them by a clic on 'Save Image':
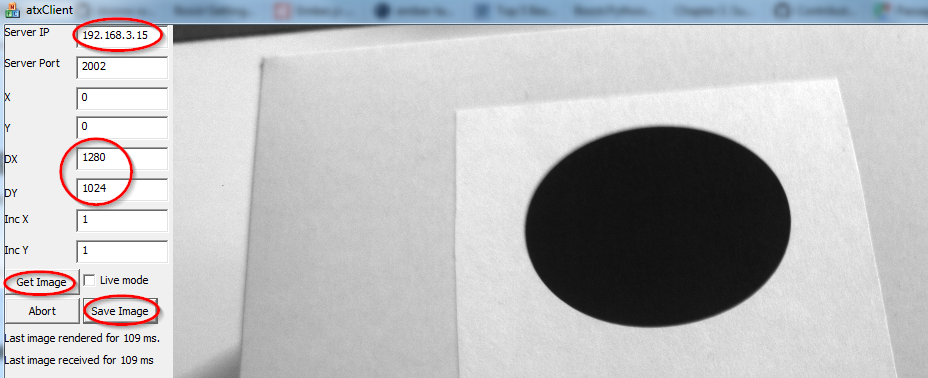
Take some images of your box and put them in the same folder in order to facilitate the next steps.
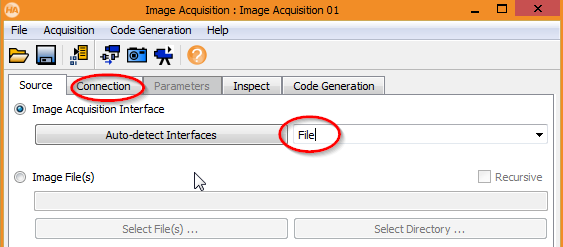
Open the HDevelop IDE on the HOST PC and the Image Acquisition Assistant:

With the 'File' interface:
And select the folder where you saved the previous images:
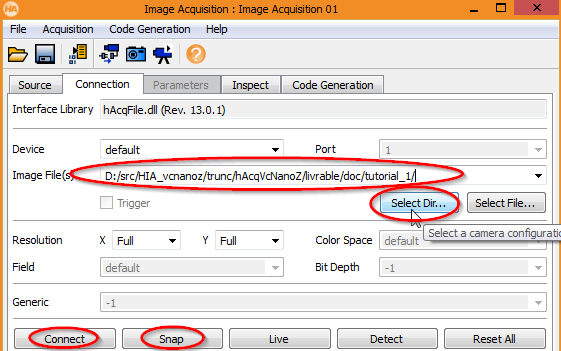
Now you can connect to this virtual camera and snap over the image series. Go on the 'Code generation' tab and click on 'Insert code'. The following code will be generated:
Finally we save the HDevelop program in the images folder, and we can use a relative path in the open_framegrabber() in order to run the program even after moving the folder:
You can get the source code here and the test image.
Next section: How to build image processing