|
Tutorial - VC-Z HALCON Image Acquisition Interface
1.0
|
|
Tutorial - VC-Z HALCON Image Acquisition Interface
1.0
|
In this chapter we will see how to run exactly the same script inside the VC-Z camera.
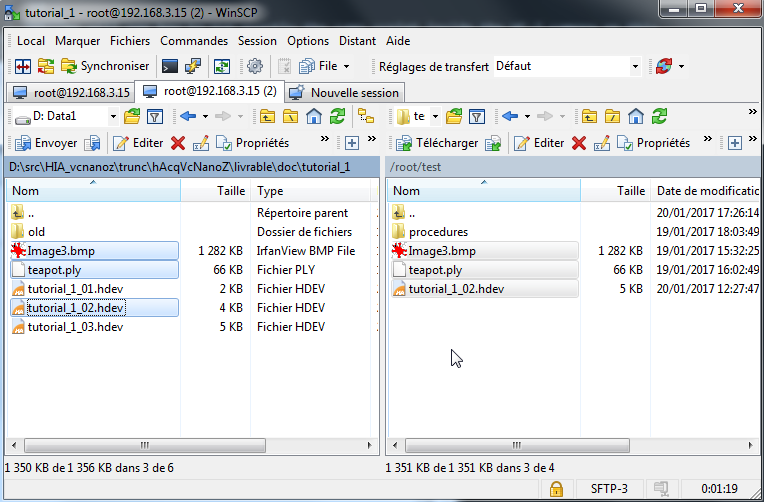
The VC-Z camera has already a FTP server. We need a FTP client on the HOST. In this example we use WinSCP.
In this tutorial, we assume that the VC-Z camera has this IP address:
We can connect our FTP client to the camera with the root password: 'root'.
We have to copy these files in a folder on the camera:
Connect to the SSH server of the device as 'root':

The password is 'root'.
VC Lib Q library (HALCON embedded runtime) is installed inside the camera in these folders by default:
| Paths | Descriptions |
|---|---|
| /opt/halcon/ | The HALCONROOT env variable is here. The folder contains the license and the folders for the images and the examples. |
| /usr/lib/ | Every .so library files |
| /usr/bin/ | The tool to launch the HDevelop script files called 'hrun' and the benchmark tool called 'hbench'. |
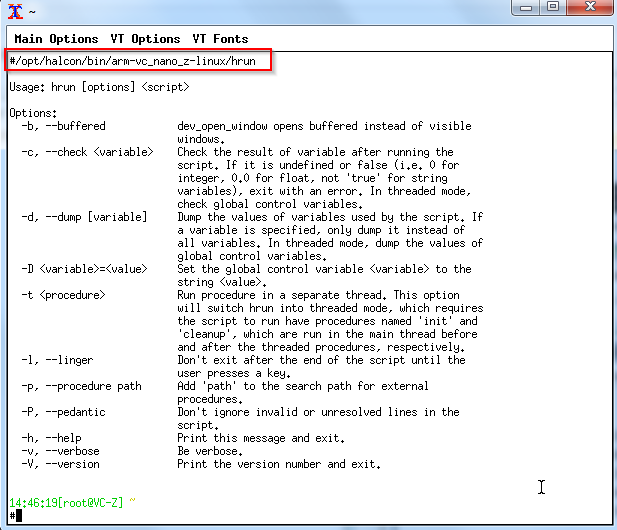
You can launch the HDevelop script files by calling the tool 'hrun':
When we are in the folder of the .hdev file, we can launch it by this command:
Have a look at the help message of the 'hrun' program to discover every available features:
If you connect to the camera in SSH via a Cygwin terminal xterm and if you install also the X Server like it is described in the VC Lib Q tutorial paragraph 2.5, you will see a window opened by the camera on your HOST to see the result like in HDevelop:
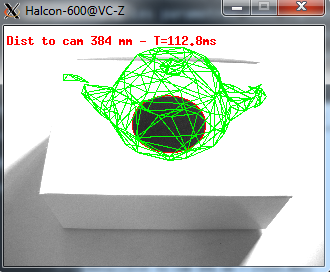
If you look at the previous image, you can see there are no XYZ axes displayed. The reason is that it is done by the procedure 'disp_3d_coord_system' defined by MVTec and installed in the folder 'procedures' in the path $HALCON_ROOT. Unfortunately this folder is not installed on embedded device. But we can run 'hrun' with '-p' parameter to add a procedure path in order to find every procedures used by our .hdev program
To work around this issue, you can copy-paste this folder from the HOST:
to the folder of the .hdev file into the camera.
Now we can run one more time with this command in order to see the XYZ coordinate system:
The result looks better:

Next section: Image sensor acquisition, Triggering and Sending results